Overview
To set up AWS cost integration in OpsHelm, you should:
- Have an AWS account with billing access
- Have the AWS account onboarded in OpsHelm
- Follow the steps below to create a Cost and Usage Report (CUR 2.0)
Setup
Prerequisite: generate a Cost and Usage Report (CUR 2.0)
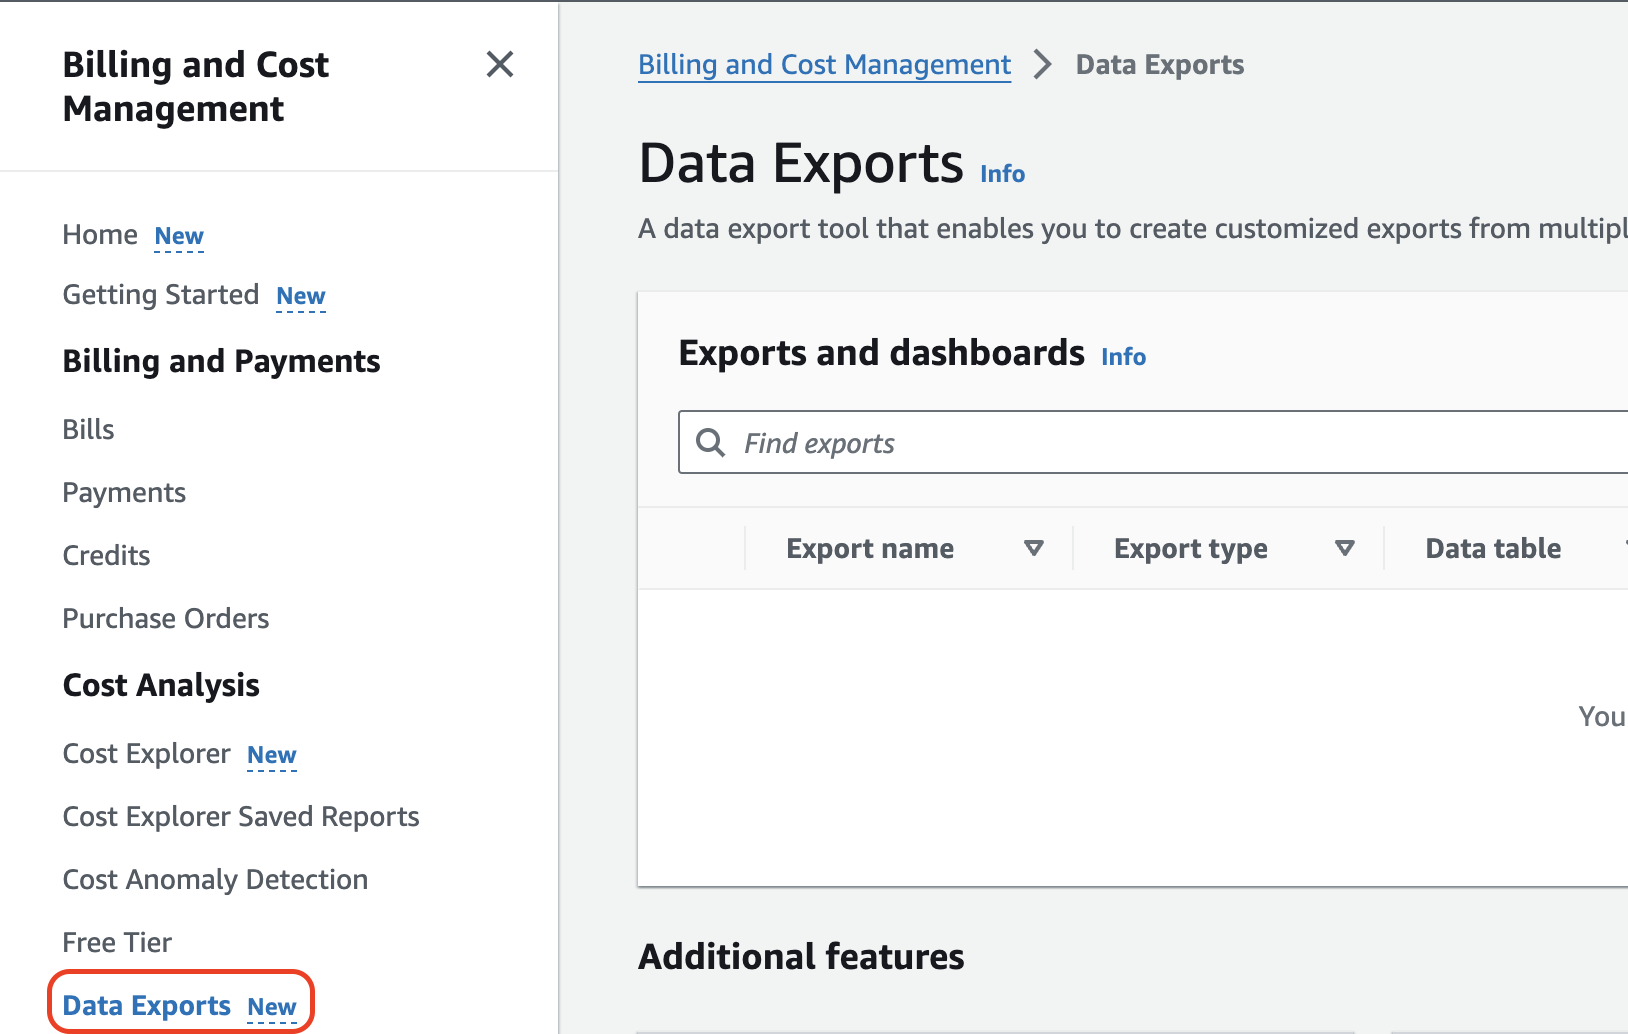
Create a Cost and Usage Report (CUR 2.0) in AWS under the Billing and Cost Management -> Data Exports section.

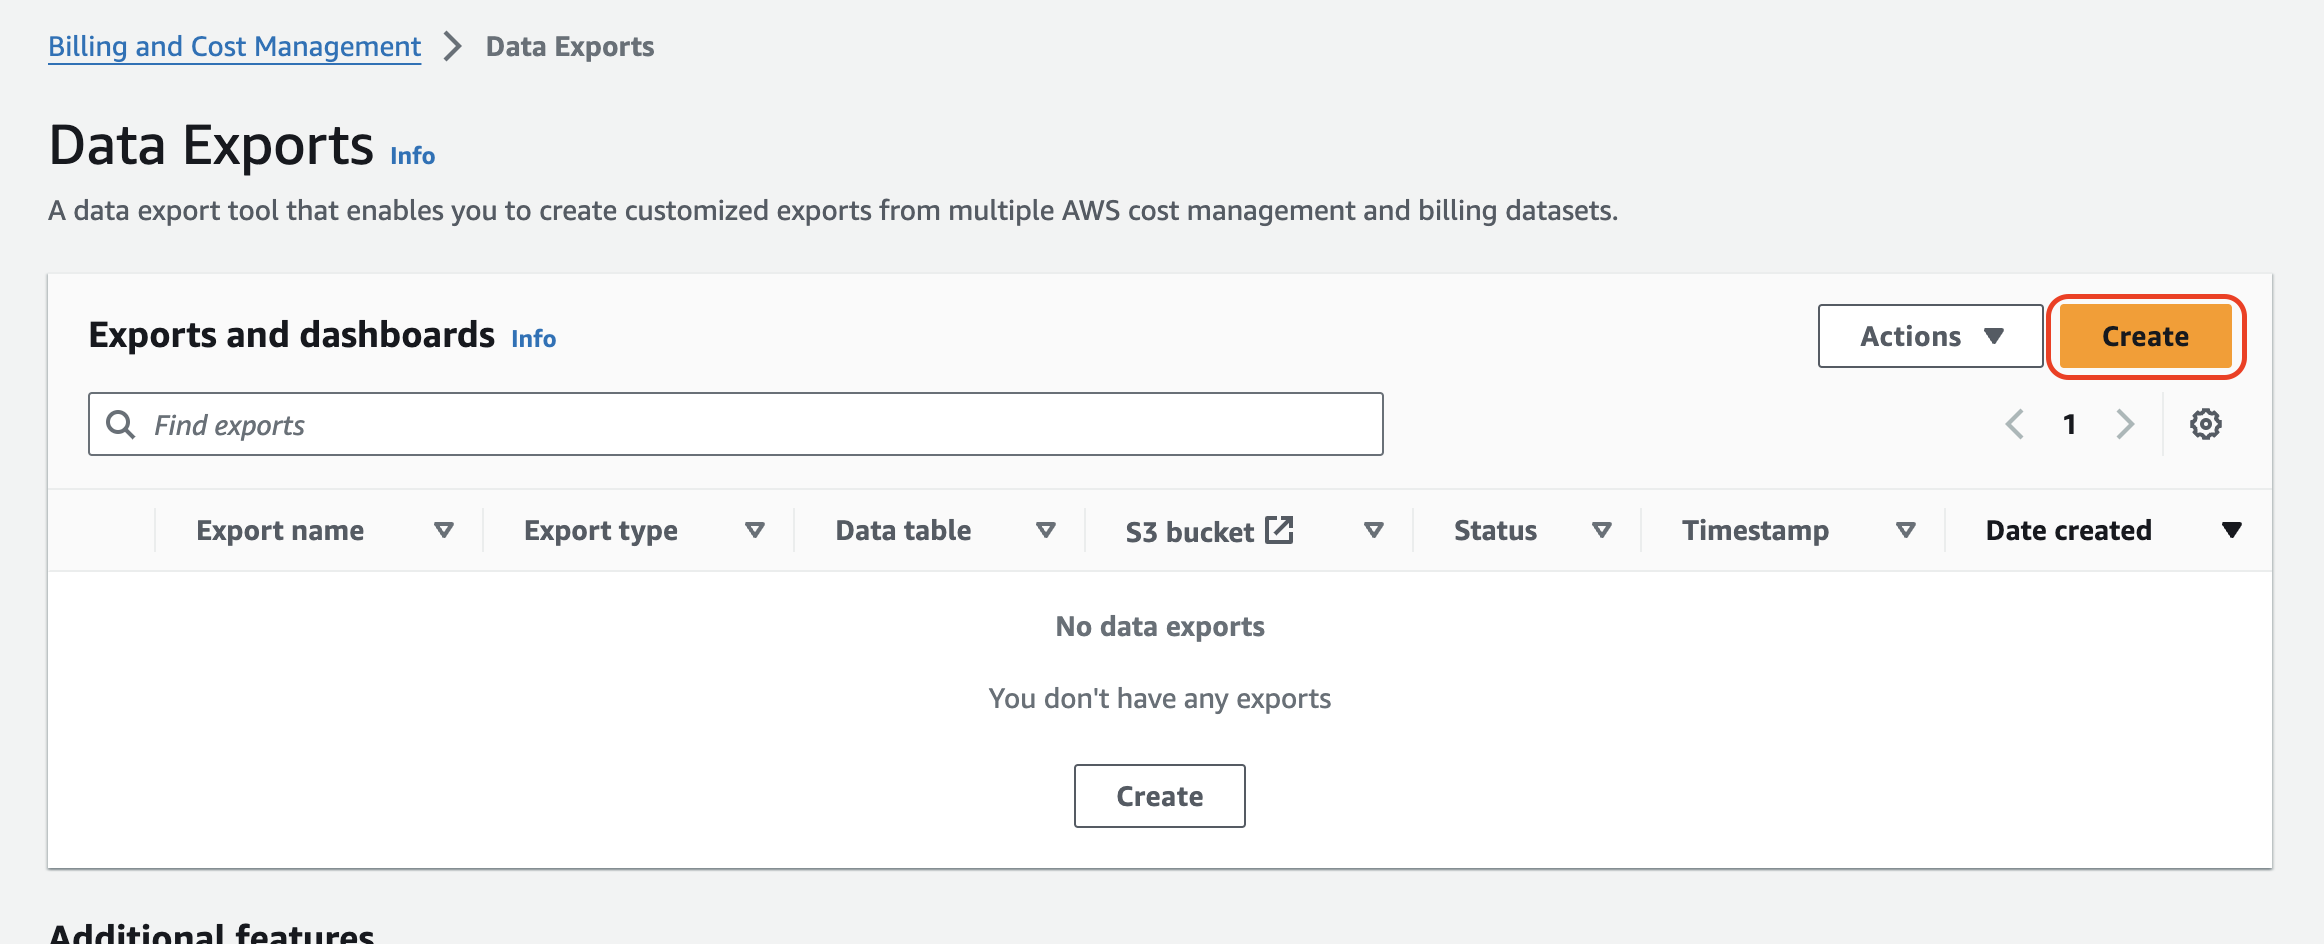
Click Create button.

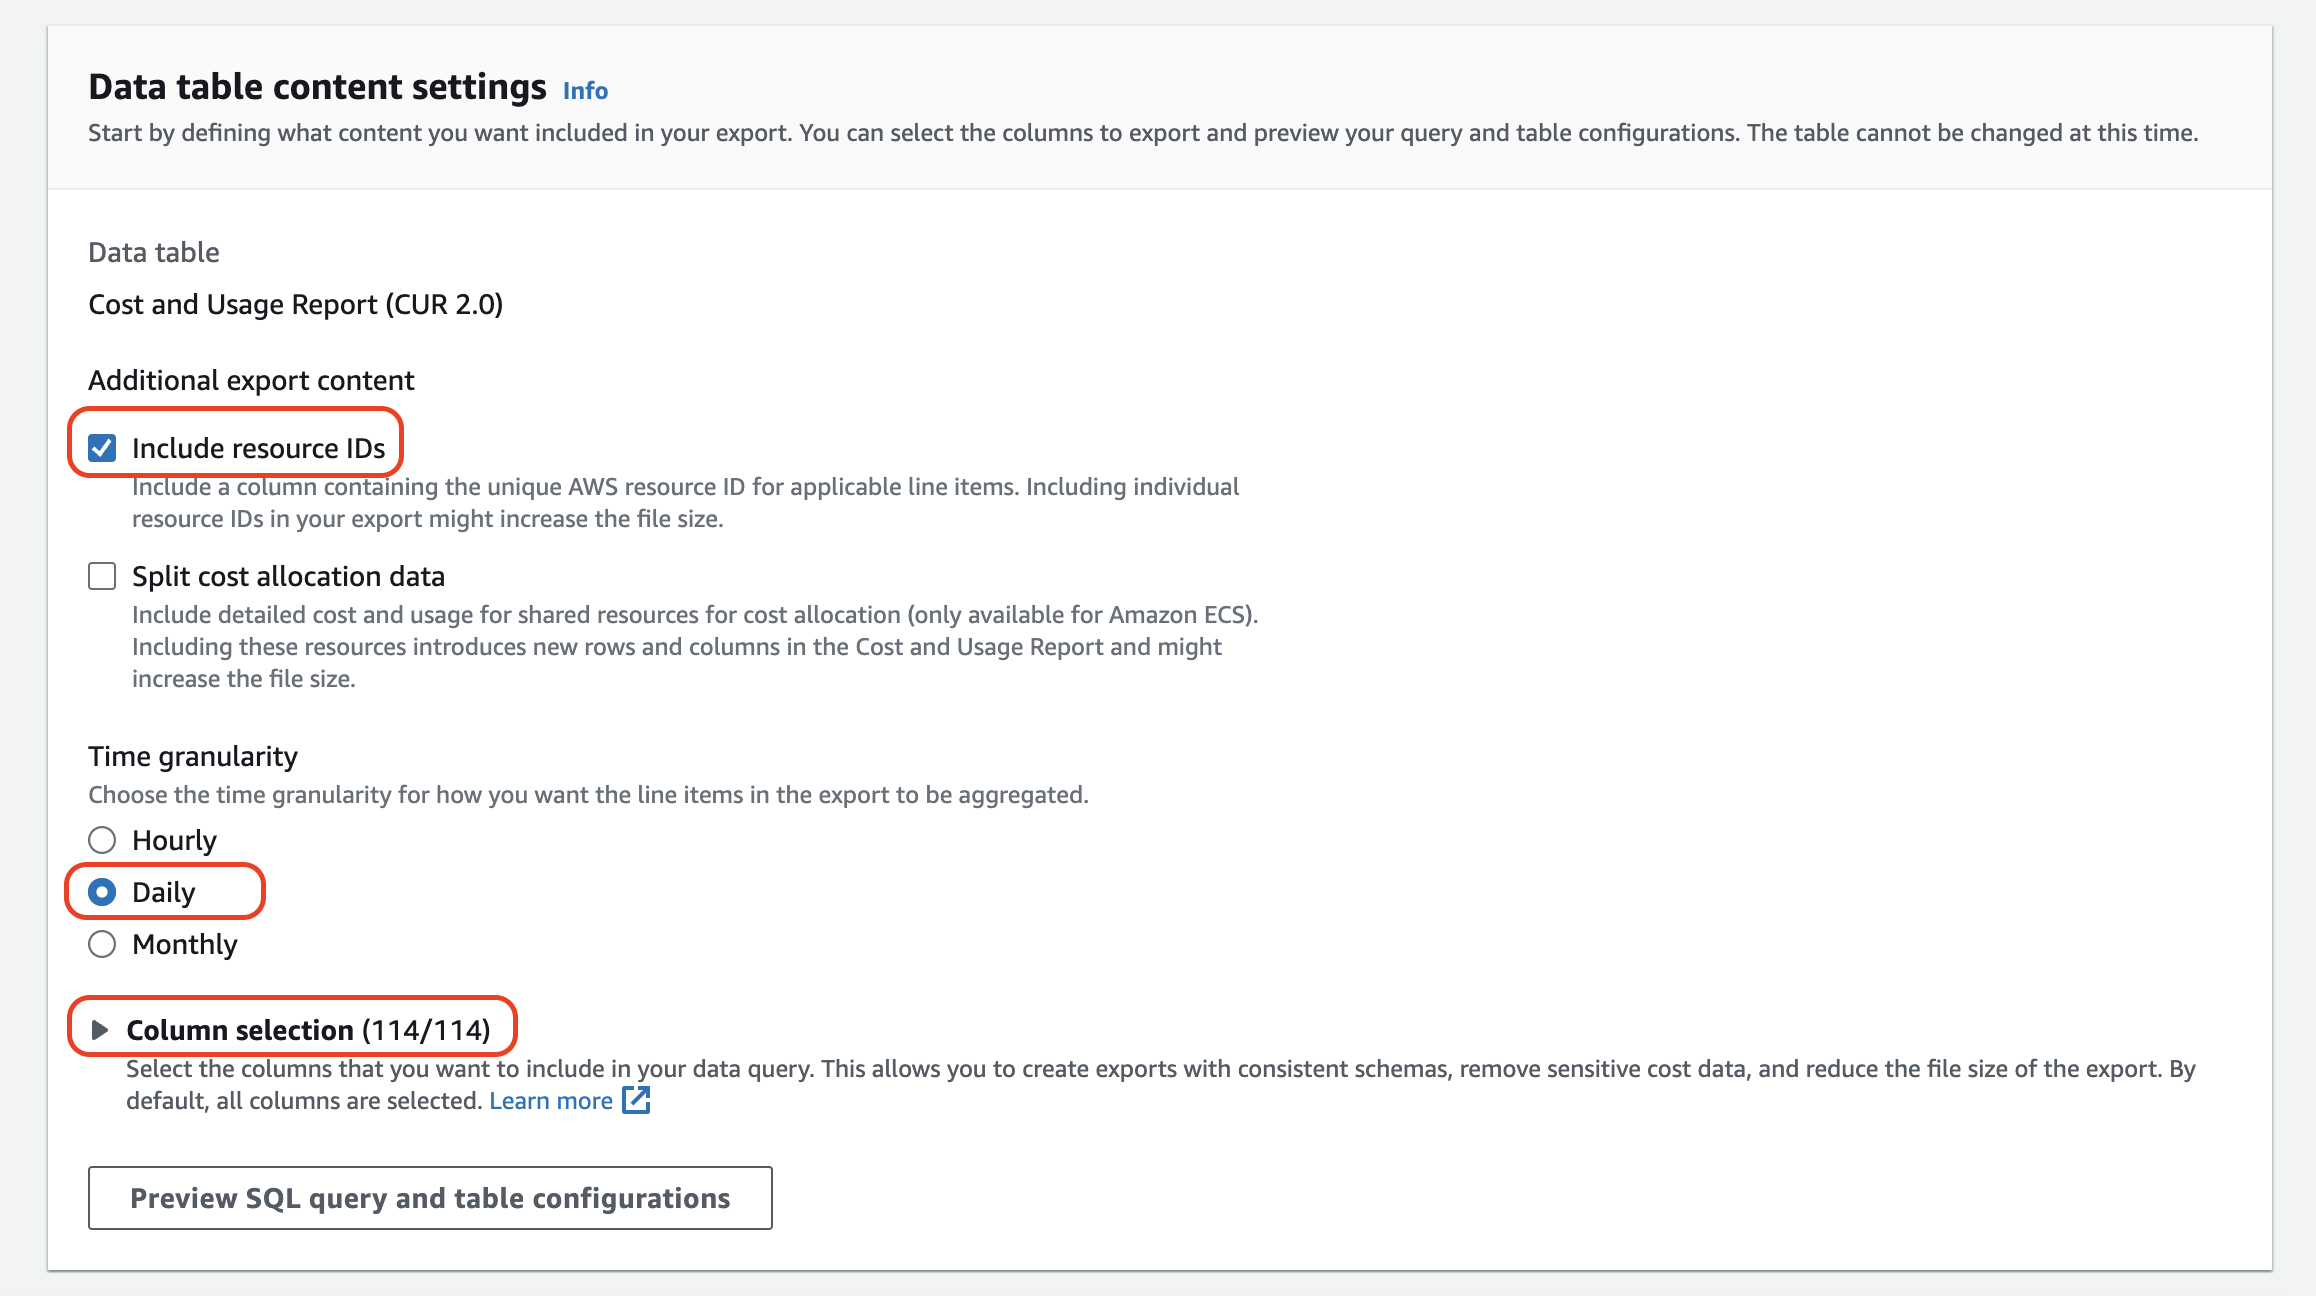
Name your report and select the following content options: Select the following content options:
Include resource IDs- Time granularity:
Daily - Column selection:
All

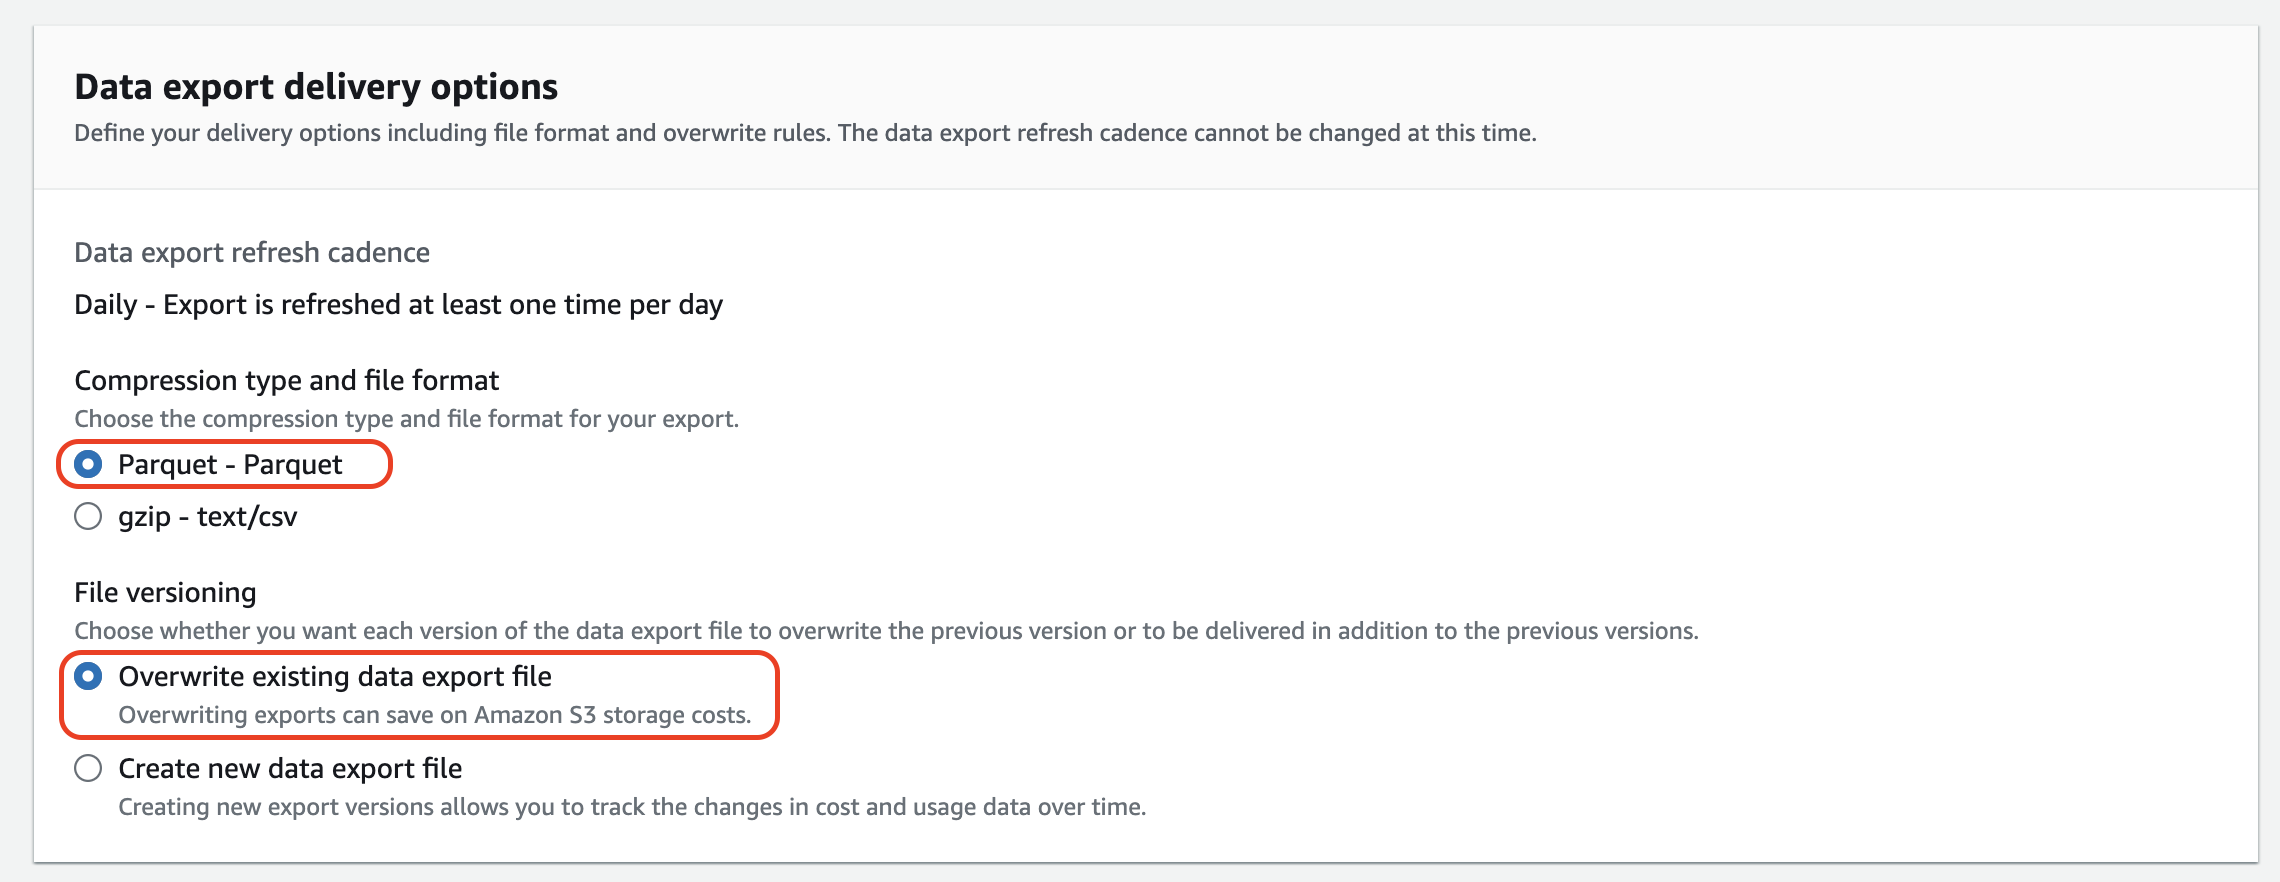
Select the following data export delivery options:
- File versioning:
Overwrite existing data export file - Compression type and file format:
Parquet

Create a new S3 bucket or specify an existing S3 bucket and S3 path prefix to store your report. Save these parameters for later usage. The report should be displayed in the following way.

Enable OpsHelm to Locate the Cost and Usage Report (CUR 2.0)
To set up the AWS cost integration, fill these fields with their corresponding details:
Bucket Name:This is the name of the s3 bucket that the report is saved to.Report Path Prefix:This is the folder name.Report Name:This is the name entered when the report was generated.
Configure access to the Cost and Usage Report (CUR 2.0)
Configure AWS to allow OpsHelm to access the s3 bucket containing the CUR report data by creating a policy using the following JSON:
{
    "Version": "2012-10-17",
    "Statement": [
        {
            "Sid": "ReadBucket",
            "Effect": "Allow",
            "Action": [
                "s3:ListBucket"
            ],
            "Resource": "arn:aws:s3:::BUCKETNAME"
        },
        {
            "Sid": "GetReport",
            "Effect": "Allow",
            "Action": [
                "s3:GetObject",
                "s3:GetObjectTagging",
                "s3:PutObject",
                "s3:PutObjectAcl",
                "s3:PutObjectTagging"
            ],
            "Resource": "arn:aws:s3:::BUCKETNAME/PATHTOREPORT/*"
        },
        {
            "Sid": "PutReportToOpsHelm",
            "Effect": "Allow",
            "Action": [
                "s3:PutObject",
                "s3:PutObjectAcl"
            ],
            "Resource": [
                "arn:aws:s3:::OHBUCKETNAME",
                "arn:aws:s3:::OHBUCKETNAME/*"
            ],
            "Condition": {
                "StringEquals": {
                    "s3:x-amz-acl": "bucket-owner-full-control"
                }
            }
        }
    ]
}
Attach the policy to the OpsHelm role
Attach the new policy to the OpsHelm role.
- Navigate to Roles in the AWS IAM console.
- Locate the role used by the OpsHelm. By default, it starts with
OpshelmIntegration_, but could be different if it was changed during onboarding. - Click Attach policies.
- Enter the name of the bucket policy created above.
- Click Attach policy.
Note: Data can take up to 48 hours to appear in OpsHelm.