Connecting an AWS Account
To connect an AWS account to OpsHelm, follow the steps below.
Start the onboarding process
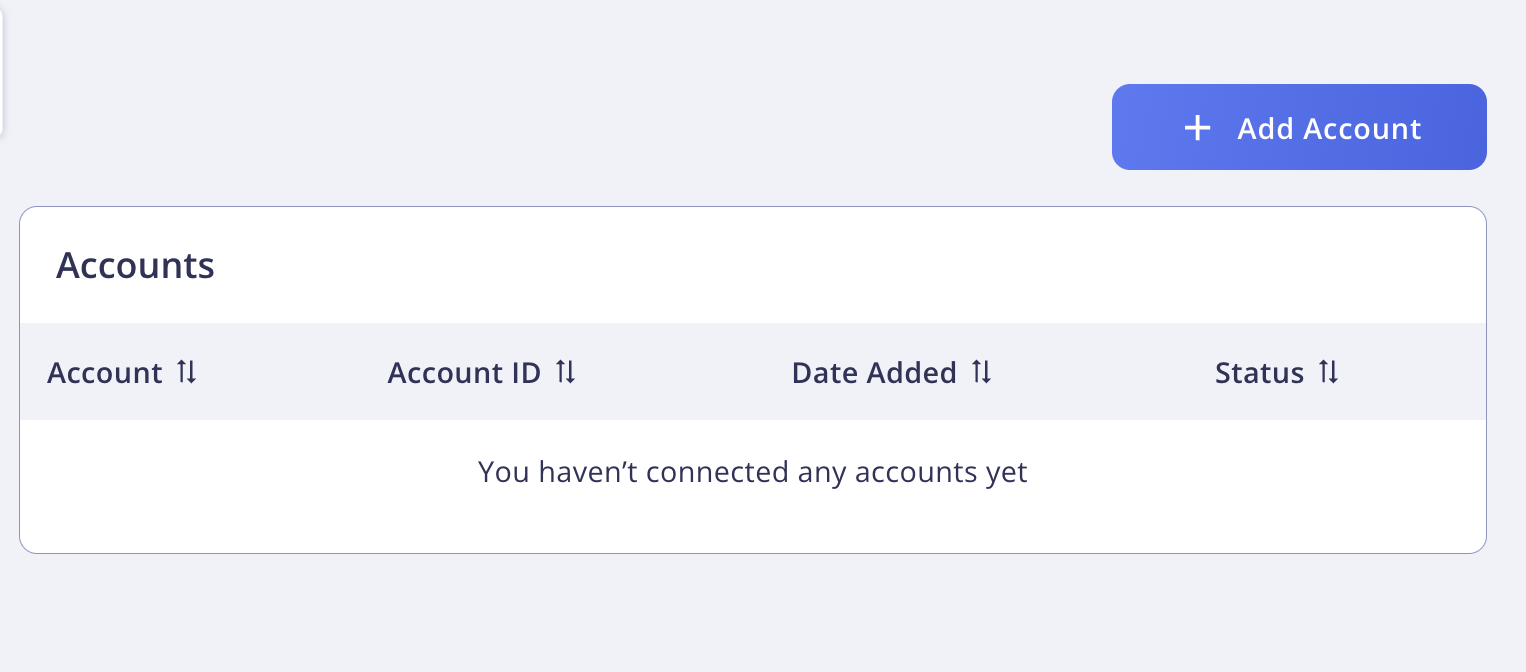
- First, go to the Accounts page in the dashboard.
- On the Accounts page, click the
Add Accountbutton, and selectAWSunder Cloud Provider.
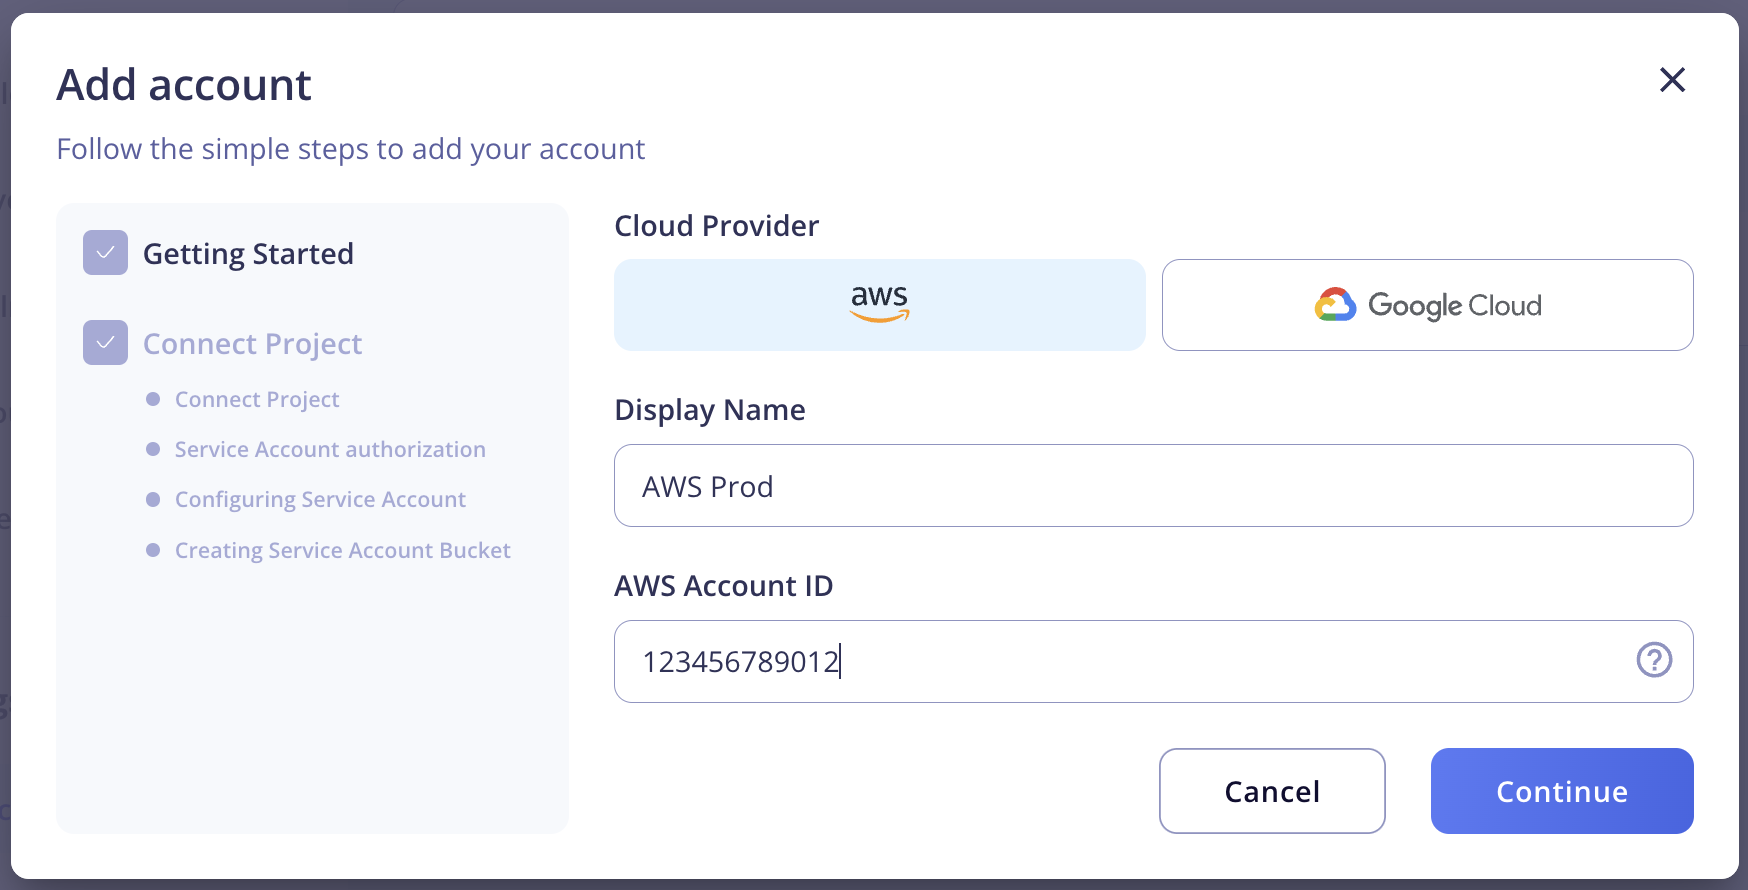
- In the onboarding modal, specify a Display Name1 for your account and enter your 12-digit AWS account ID. Then, click continue to begin the onboarding process.
Authorize OpsHelm
Once the onboarding process is started, you need to authorize OpsHelm to connect to your AWS account. This involves creating a role that OpsHelm can assume in your account, and assigning it several permissions. The sections below describe how to provision the necessary role. While we recommend using Terraform (or any other infrastructure-as-code tool) to manage this configuration, manual steps are also included below.
Terraform Configuration (Recommended)
In order to simplify the process, the application provides the necessary Terraform configuration for provisioning the required role. Copy the supplied Terraform configuration from the onboarding modal, add it to the Terraform configuration associated with your account, and apply it. Once applied, click the Continue button in the onboarding modal.
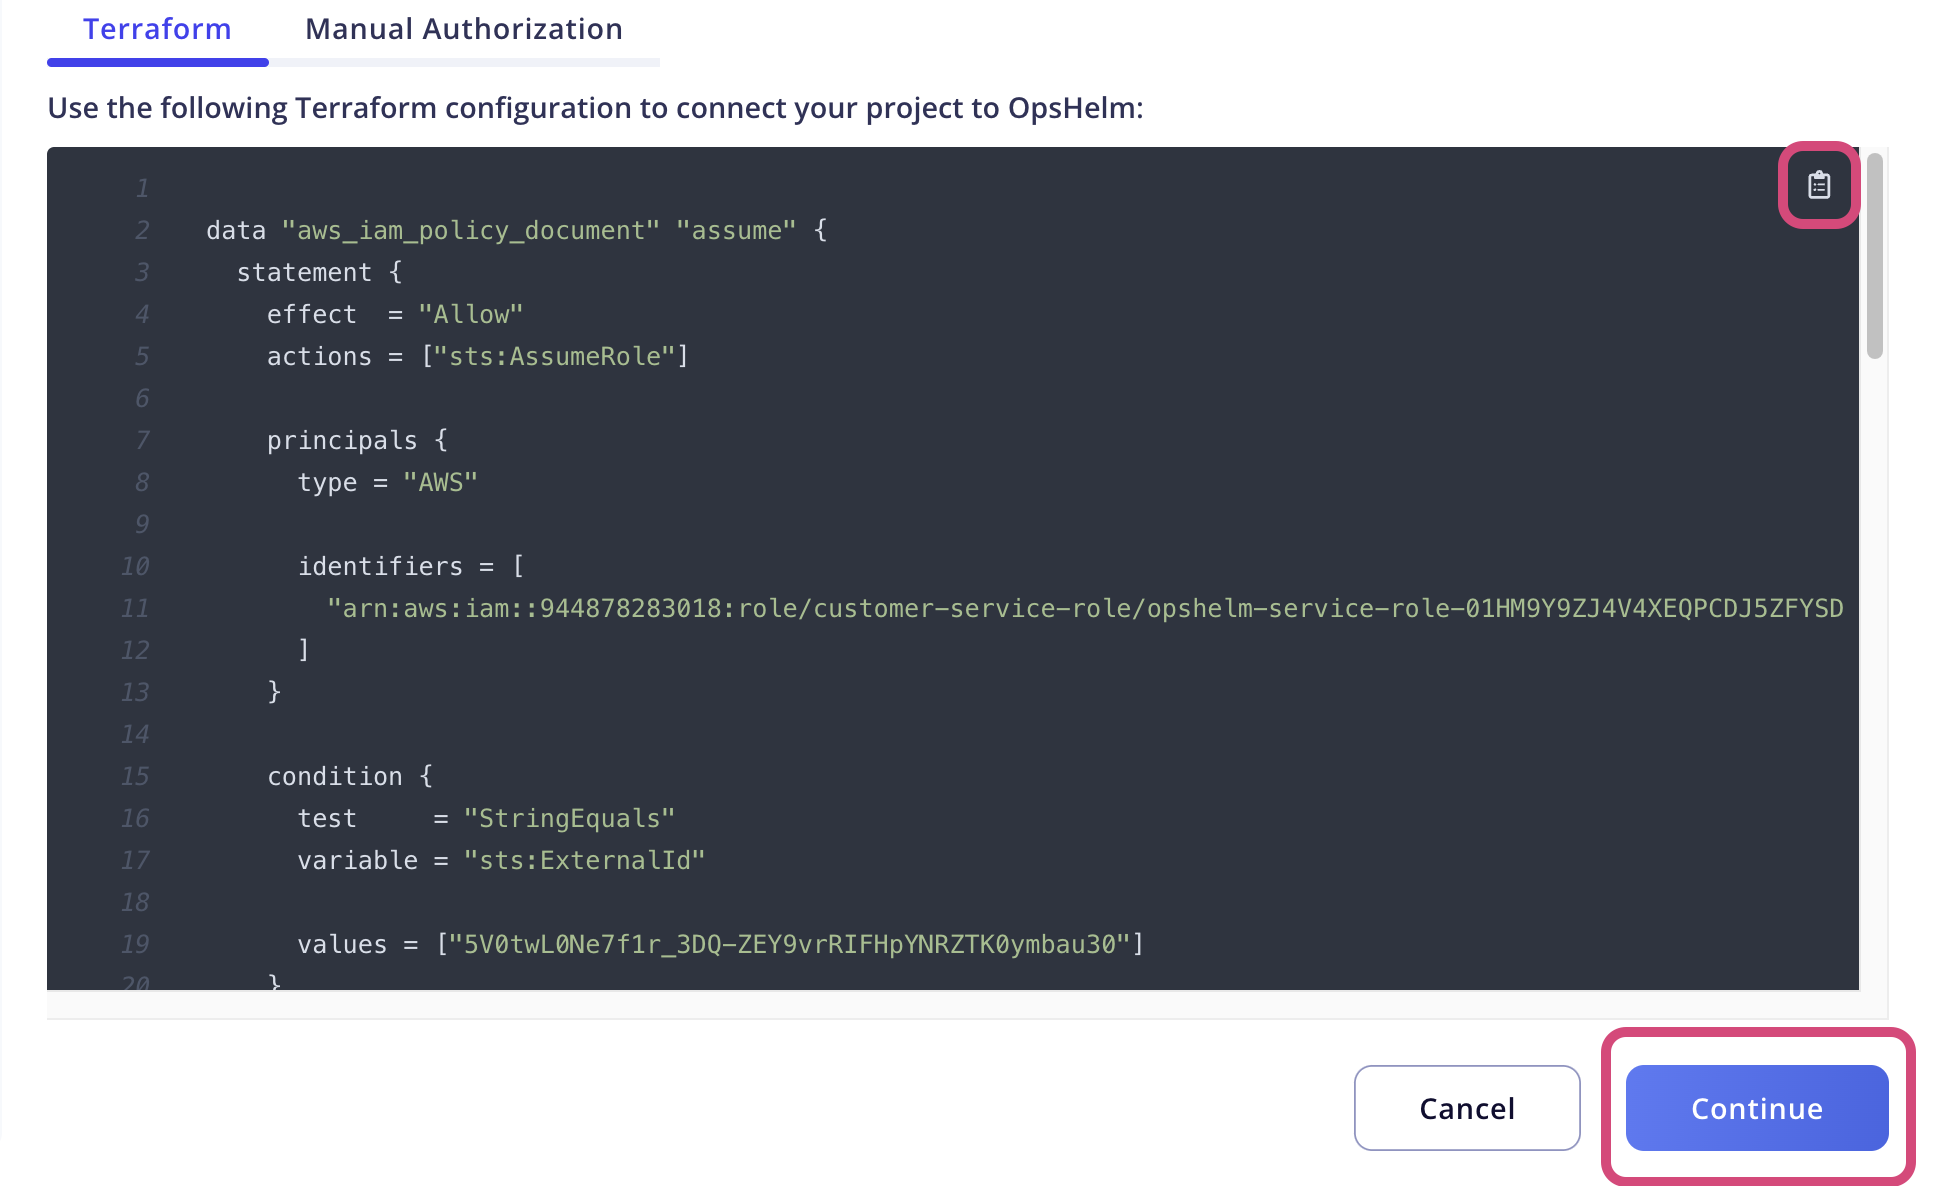
The supplied Terraform configuration creates a role, attaches several managed policies, and creates and attaches a custom policy. See the manual configuration steps below for details about which policies are required.
Manual Configuration
If you wish to manually authorize OpsHelm, follow the steps below to create the required role to allow OpsHelm to connect to your account.
Note: The steps below contain template policy documents with variables that are specific to your account connection which must be replaced by hand. If you are an OpsHelm customer who is connecting an AWS account in this way, we recommend using the link to this page from the Manual Instructions tab of your account's onboarding modal, which will automatically fill in these variables for you with the appropriate connection-specific values.
For the steps below, the policy documents contain the following placeholders: ACCOUNT_ID, OPSHELM_ROLE_ARN, and EXTERNAL_ID. You will need to replace any instances of ACCOUNT_ID with your 12-digit AWS account ID. The values for OPSHELM_ROLE_ARN and EXTERNAL_ID should be replaced with the values found in the onboarding screen in the dashboard.

- Sign in to the AWS Console
- Navigate to the IAM Console
- Go to
Policiesand clickCreate Policy - Click the
JSONtoggle. Then, paste in the policy document below, replacing occurrences ofACCOUNT_IDwith your AWS account ID, and clickNext.
{
    "Version": "2012-10-17",
    "Statement": [
        {
            "Effect": "Allow",
            "Action": [
                "iam:CreateRole",
                "iam:PutRolePolicy",
                "iam:TagRole",
                "iam:UpdateAssumeRolePolicy",
                "iam:PassRole",
                "iam:DetachRolePolicy",
                "iam:DeleteRolePolicy",
                "iam:DeleteRole"
            ],
            "Resource": [
                "arn:aws:iam::ACCOUNT_ID:role/EventBridge-opshelm-ingest_ULID",
                "arn:aws:iam::ACCOUNT_ID:role/OpshelmIntegration_ULID",
                "arn:aws:iam::ACCOUNT_ID:role/OpshelmFirehoseIntegration_ULID"
            ]
        },
        {
            "Effect": "Allow",
            "Action": [
                "iam:CreateServiceLinkedRole"
            ],
            "Resource": "arn:aws:iam::ACCOUNT_ID:role/aws-service-role/apidestinations.events.amazonaws.com/AWSServiceRoleForAmazonEventBridgeApiDestinations"
        }
    ]
}
- Enter a name for the role, such as
OpsHelm_EventBridge_Role_Creation(this name is purely for your own convenience and does not need to be formatted in a specific way for OpsHelm), and clickCreate Policy. - Go to the
Rolesand clickCreate Role - Under
Trusted entity typeselectCustom Trust Policy. Then, paste in the trust policy below, replacingOPSHELM_ROLE_ARNandEXTERNAL_IDwith the values displayed in the dashboard, and clickNext.
{
    "Version": "2012-10-17",
    "Statement": [
        {
            "Sid": "AllowOpsHelm",
            "Effect": "Allow",
            "Principal": {
                "AWS": "ROLE_ARN"
            },
            "Action": "sts:AssumeRole",
            "Condition": {
                "StringEquals": {
                    "sts:ExternalId": "EXTERNAL_ID"
                }
            }
        }
    ]
}
- Add the necessary permissions to the role:
- Search for the customer-managed policy you created in step 4, and add it to the role.
- Search for the following AWS-managed policies and add each one to the role:
SecurityAuditAWSCloudTrail_FullAccessAmazonEventBridgeFullAccessAmazonKinesisFirehoseFullAccess
- Click
Next
- Copy the Role Name from the OpsHelm dashboard and enter that into the
Role namefield. You may also add aDescription, if you wish. - Ensure that the
Add Permissionssection lists the 4 policies that should be attached to the role.

- In the OpsHelm dashboard, click
Continuein the onboarding modal.
CloudFormation Configuration
Coming soon!
Wrapping Up
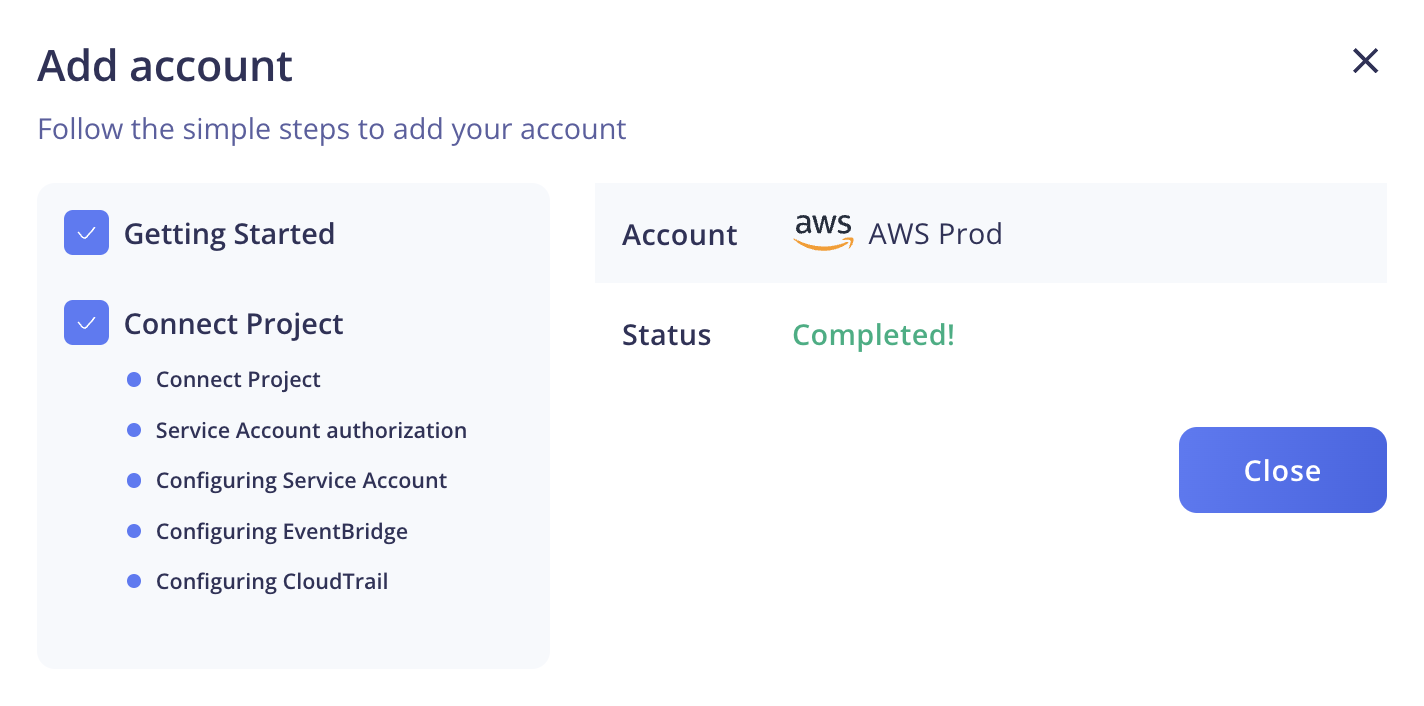
After authorizing OpsHelm and clicking Continue, the onboarding process will connect your account to OpsHelm.
The onboarding screen will display the status on the onboarding process while it's in progress.
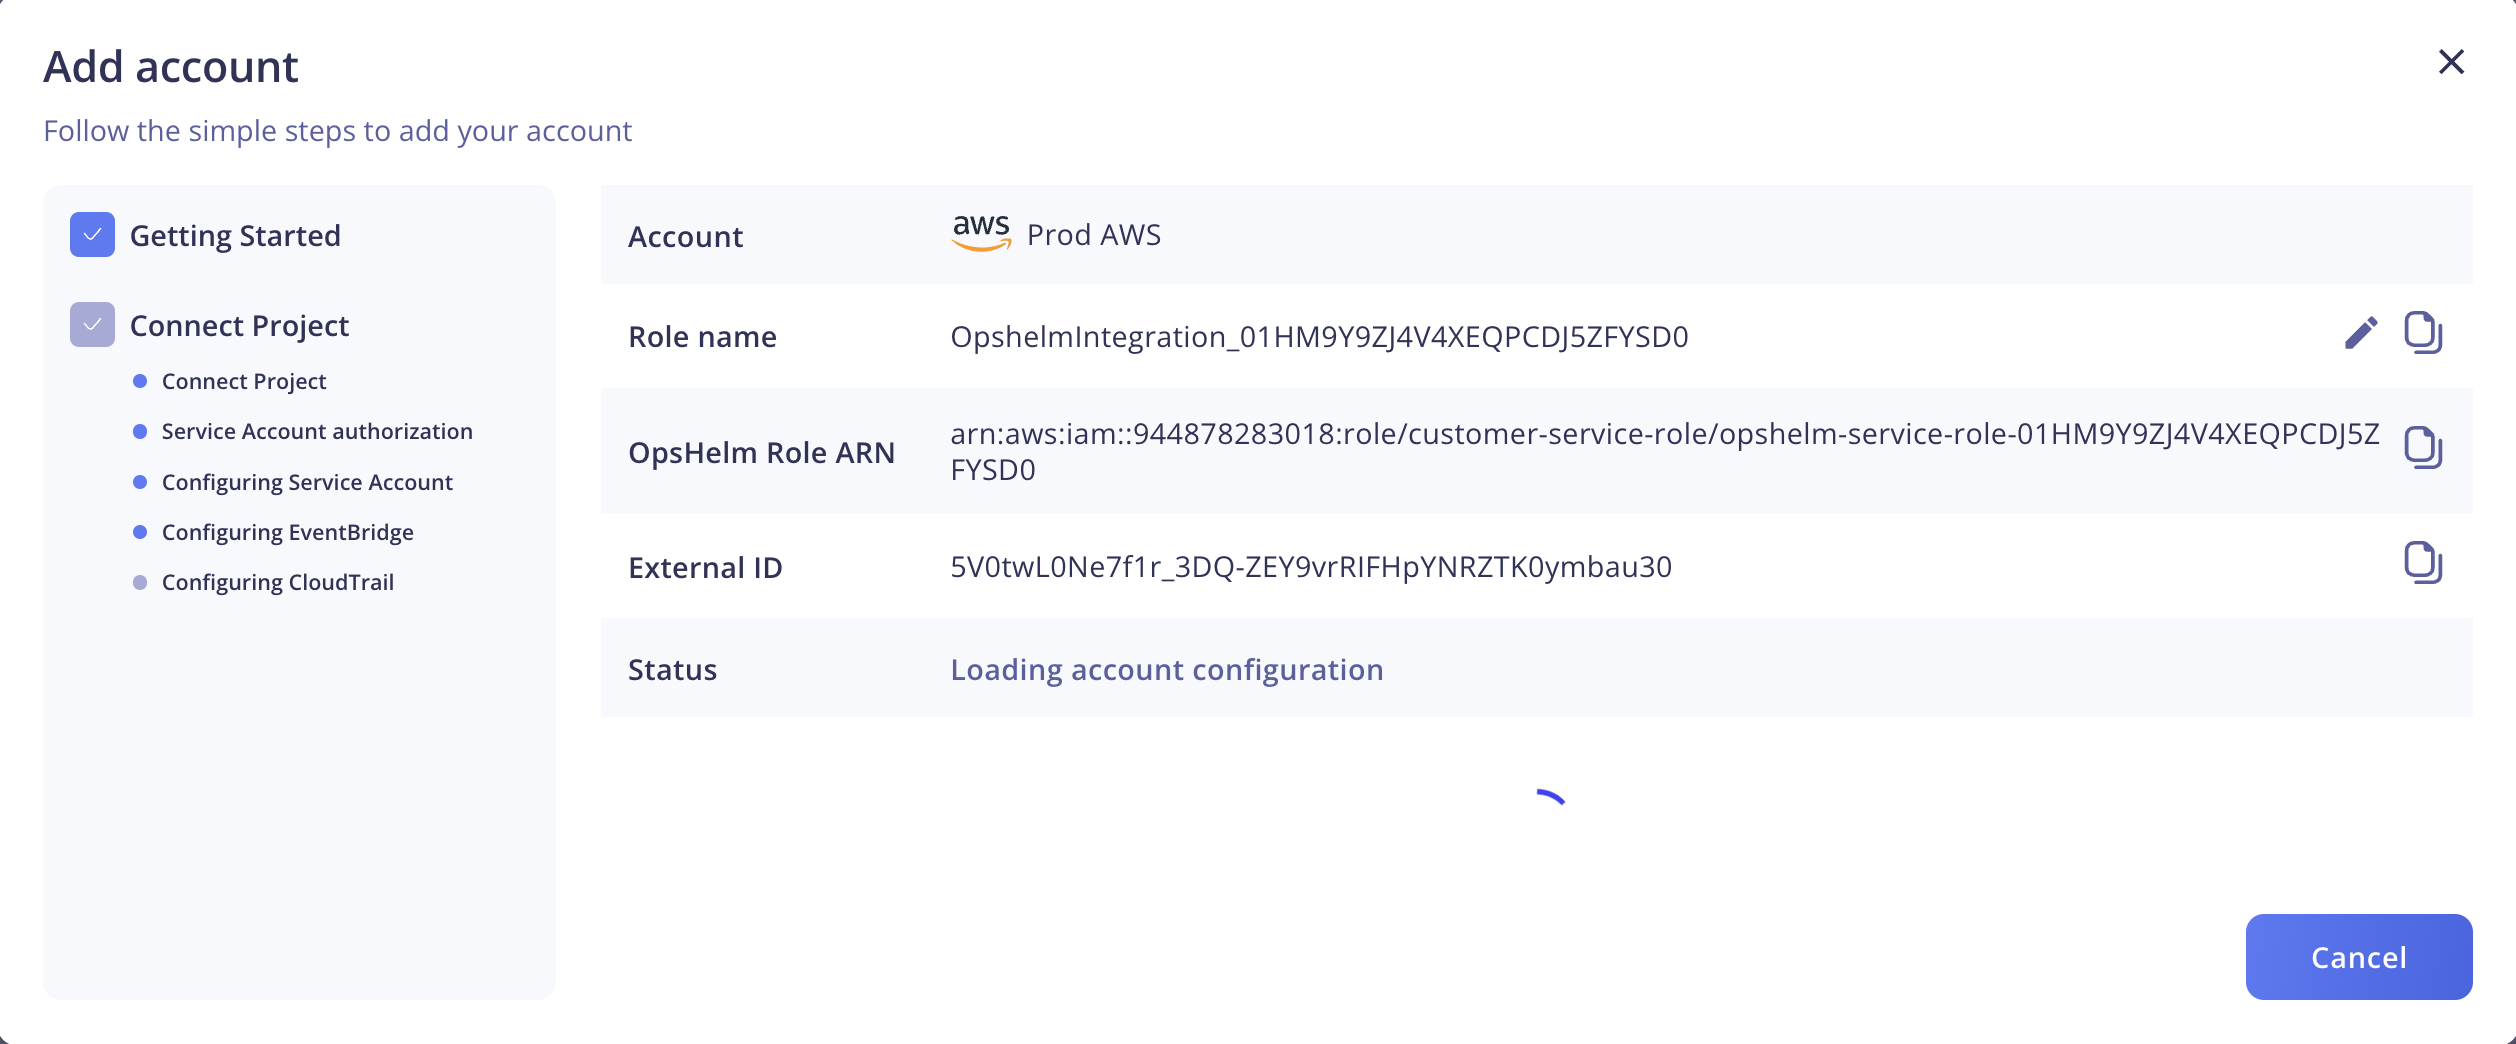
Once the onboarding process is complete, click the Close button.
Footnotes
-
The Display Name is shown throughout the dashboard alongside information and resources associated with the account. We recommend choosing a name that's easily recognizable. ↩