Connecting an AWS Account
To connect an AWS organization to OpsHelm, follow the steps below.
Start the onboarding process
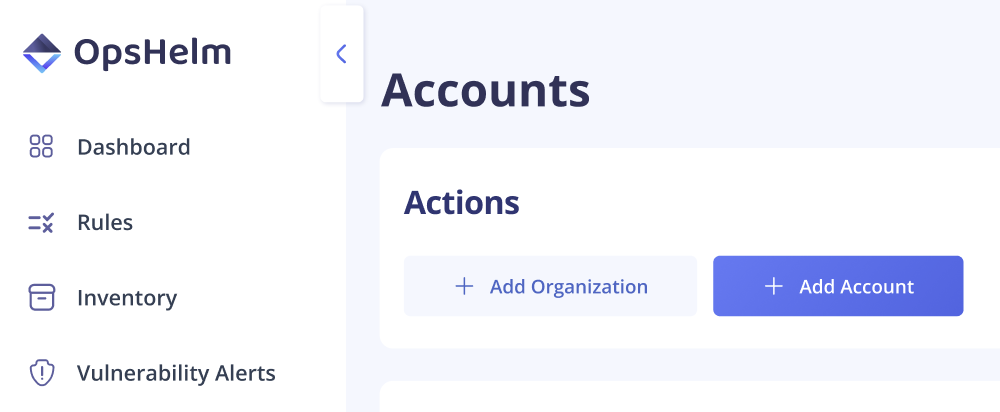
- First, go to the Accounts page in the dashboard.
- On the Accounts page, click the
Add Organizationbutton, and selectAWSunder Cloud Provider.
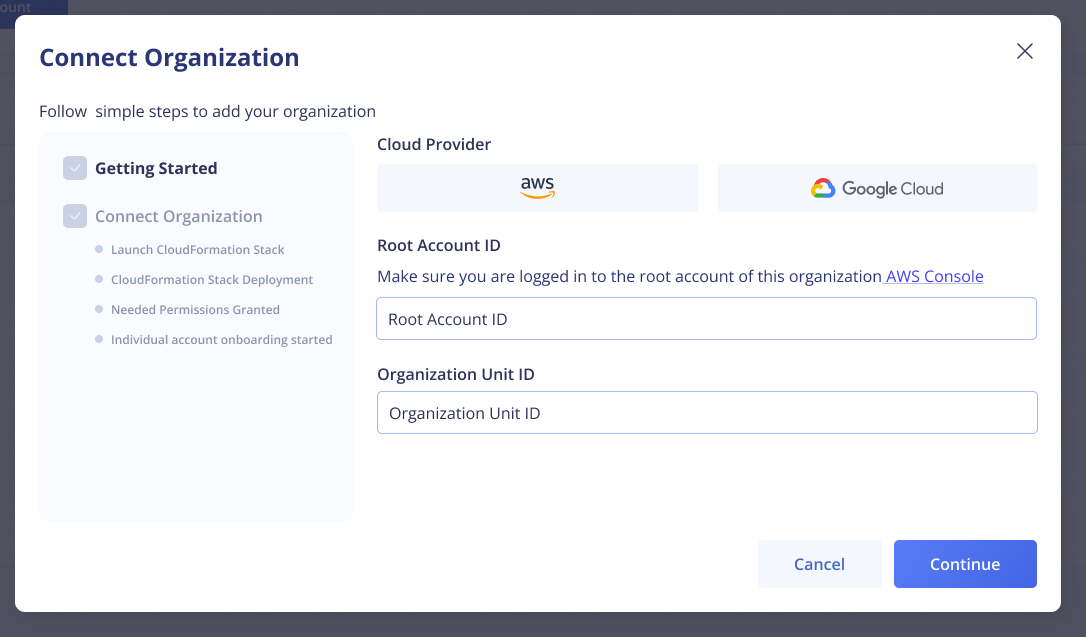
- In the onboarding modal, select the AWS logo, enter your 12-digit AWS root (the one responsible for paying the bills for all accounts in the organization) account ID and specify the organization unit ID.
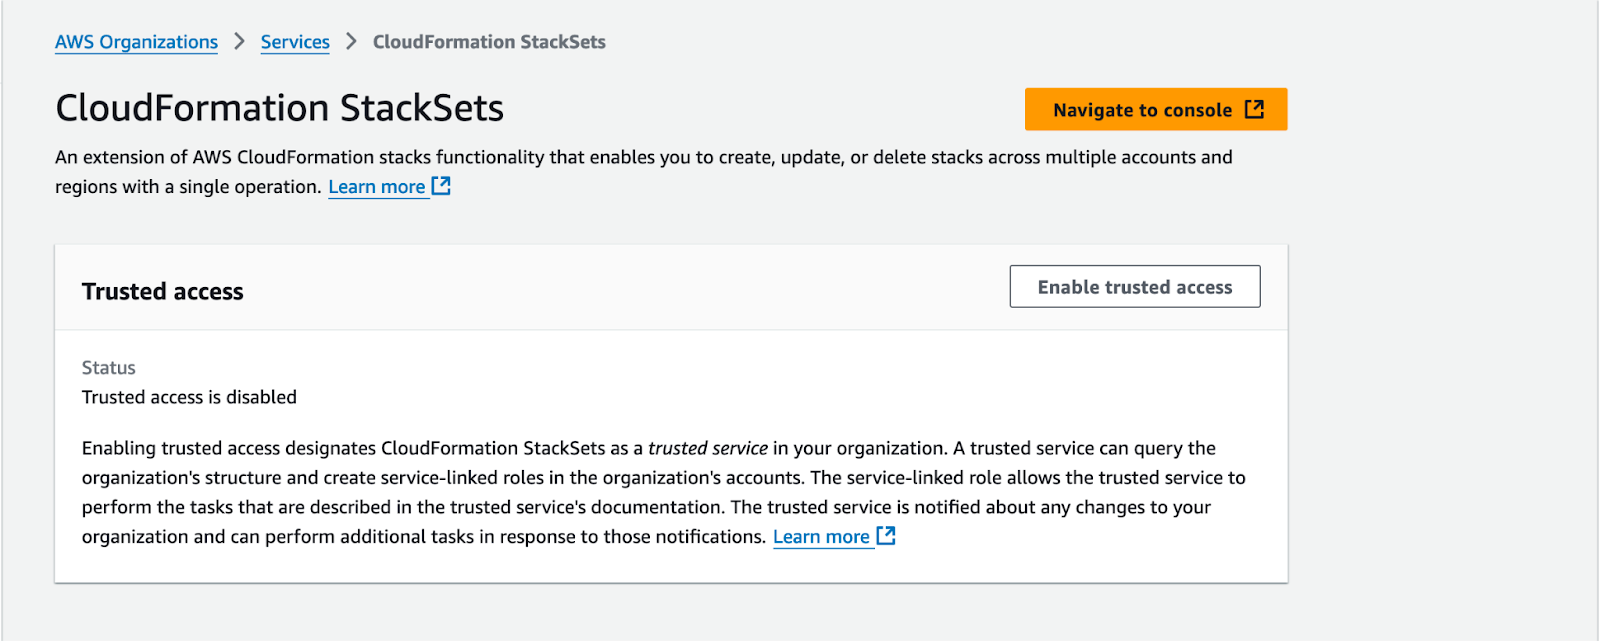
Before proceeding, make sure that trusted access for stack sets is enabled with AWS Organizations.
To enable Trusted Access, please visit the StackSets console and select the “Activate trusted access” button in the banner at the top of your screen.

If you do not have this banner present, then trusted access should already be enabled. If you are presently on the Organizations Trusted Access management screen, please select the “Navigate to console” button to enable trusted access correctly. Selecting “Enable trusted access” will not correctly enable trusted access for CloudFormation Stack Sets.
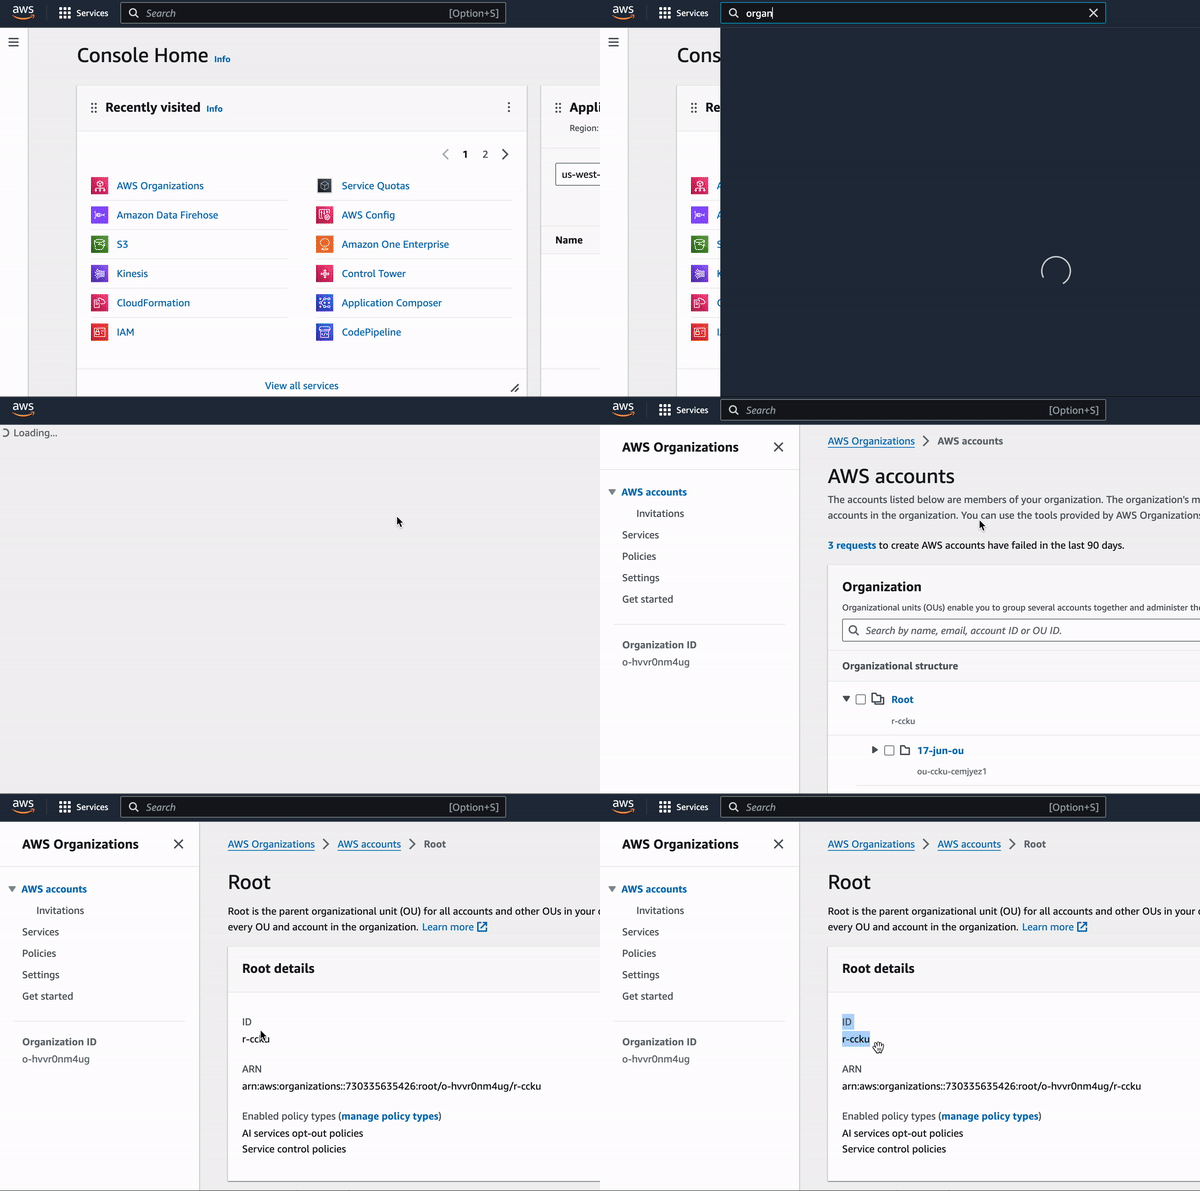
To find the Organization Unit ID, follow the steps below:
- Navigate to the AWS Organizations service.
- In the Organizations console, select "Organizations" from the sidebar.
- Click on the "Root" link in the Organizational structure view.
- Select value under ID column. In the example below, the Organization Unit ID is
r-ccku.
Then, click continue to begin the onboarding process.
Authorize OpsHelm
Once the onboarding process is started, you need to authorize OpsHelm to connect to your AWS account. This involves creating a CloudFormation Stack with a role that OpsHelm can assume in your account with assigning it several read only permissions, and a StackSet with subsequent roles for specified accounts. The sections below describe how to provision the necessary Stack.
CloudFormation Configuration
We are using a CloudFormation Stack and StackSet to create the necessary roles and permissions in your AWS accounts. Here is an example of the CloudFormation template that you can use to create the necessary roles and permissions in your AWS accounts.
The latest templates could be found in the links below.
OpsHelm AWS Organization Onboarding Stack
OpsHelm AWS Organization Onboarding StackSet
AWSTemplateFormatVersion: '2010-09-09'
Description: OpsHelm integration Stack
Parameters:
  ExternalId:
    Type: String
    Description: External ID for the OpsHelm integration
  ULID:
    Type: String
    Description: Organizational ULID for the OpsHelm integration
  OpsHelmAccountID:
    Type: String
    Description: Account ID of OpsHelm
  OrganizationUnitID:
    Type: String
    Description: Organizational Unit ID of AWS organization
Resources:
  OpsHelmAdminRole:
    Type: AWS::IAM::Role
    Properties:
      RoleName: !Sub
        - OpshelmIntegration_OrgAdmin_ULID
        - ULID: !Ref ULID
      ManagedPolicyArns:
        - arn:aws:iam::aws:policy/AWSOrganizationsReadOnlyAccess
      AssumeRolePolicyDocument:
        Version: '2012-10-17'
        Statement:
          - Effect: Allow
            Principal:
              AWS: !Sub
              - arn:aws:iam::OpsHelmAccountID:role/customer-service-role/opshelm-org-service-role-ULID
              - OpsHelmAccountID: !Ref OpsHelmAccountID
                ULID: !Ref ULID
            Action: sts:AssumeRole
            Condition:
              StringEquals:
                sts:ExternalId:
                  Ref: ExternalId
  OpsHelmIntegrationRole:
    Type: AWS::IAM::Role
    Properties:
      RoleName: !Sub
        - OpshelmIntegration_ULID
        - ULID: !Ref ULID
      ManagedPolicyArns:
        - arn:aws:iam::aws:policy/SecurityAudit
        - arn:aws:iam::aws:policy/AWSCloudTrail_FullAccess
        - arn:aws:iam::aws:policy/AmazonEventBridgeFullAccess
      Policies:
        - PolicyName: EventBridgeIAMAccess
          PolicyDocument:
            Version: '2012-10-17'
            Statement:
              - Effect: Allow
                Action:
                  - iam:CreateRole
                  - iam:PutRolePolicy
                  - iam:TagRole
                  - iam:UpdateAssumeRolePolicy
                Resource: !Sub arn:aws:iam::AWS::AccountId:role/EventBridge-opshelm-ingest
              - Effect: Allow
                Action:
                  - iam:CreateServiceLinkedRole
                Resource: !Sub arn:aws:iam::AWS::AccountId:role/aws-service-role/apidestinations.events.amazonaws.com/AWSServiceRoleForAmazonEventBridgeApiDestinations
      AssumeRolePolicyDocument:
        Version: '2012-10-17'
        Statement:
          - Effect: Allow
            Condition:
              StringEquals:
                sts:ExternalId:
                  Ref: ExternalId
            Principal:
              AWS: !Sub
              - arn:aws:iam::OpsHelmAccountID:role/customer-service-role/opshelm-org-service-role-ULID
              - OpsHelmAccountID: !Ref OpsHelmAccountID
                ULID: !Ref ULID
            Action:
              - sts:AssumeRole
  OpsHelmStackSet:
    Type: AWS::CloudFormation::StackSet
    Properties:
      Parameters:
        - ParameterKey: ULID
          ParameterValue: !Ref ULID
        - ParameterKey: ExternalId
          ParameterValue: !Ref ExternalId
        - ParameterKey: OpsHelmAccountID
          ParameterValue: !Ref OpsHelmAccountID
      AutoDeployment:
        Enabled: true
        RetainStacksOnAccountRemoval: false
      Capabilities:
        - CAPABILITY_NAMED_IAM
      Description: OpsHelm Integration StackSet
      ManagedExecution:
        Active: true
      PermissionModel: SERVICE_MANAGED
      StackInstancesGroup:
        - Regions:
            - us-west-2
          DeploymentTargets:
            OrganizationalUnitIds:
            - Ref: OrganizationUnitID
      StackSetName: !Sub
        - OpsHelm-Integration-StackSet-ULID
        - ULID: !Ref ULID
      TemplateURL: https://opshelm-cfn-templates.s3.us-west-2.amazonaws.com/org-onboarding-stackset.yaml
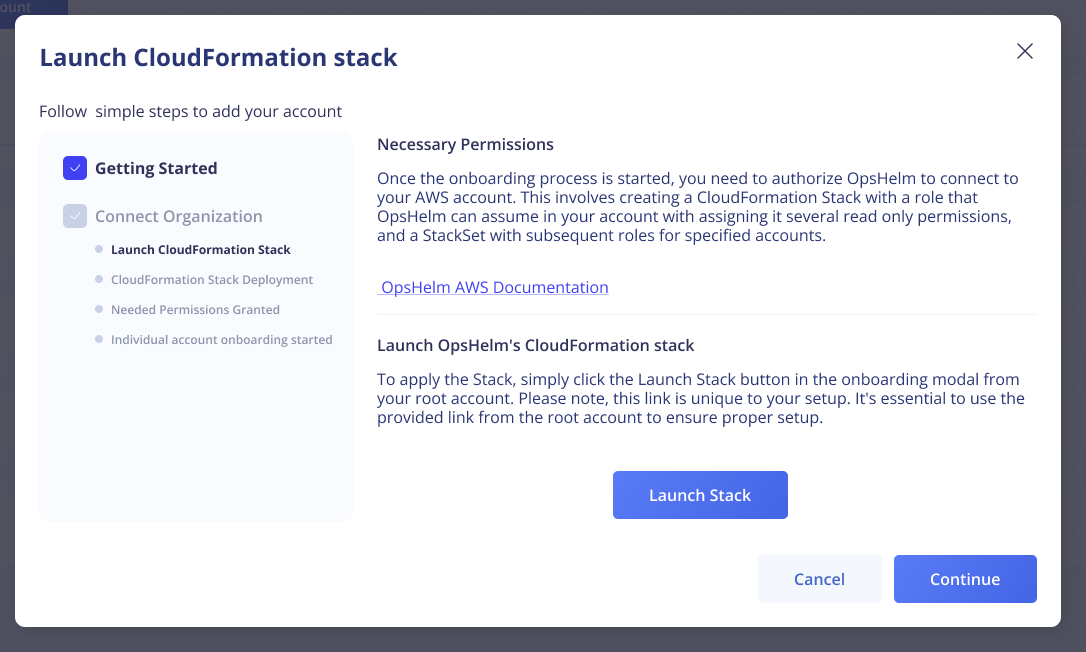
To apply the Stack, simply click the Launch Stack button in the onboarding modal from your root account. Please note, this link is unique to your setup. It's essential to use the provided link from the root account to ensure proper setup.
Apply the Stack
Once you click the Launch Stack button, you will be redirected to the AWS CloudFormation console with the Stack URL pre-filled.
- Scroll down to the bottom of the page and select the checkbox
I acknowledge that AWS CloudFormation might create IAM resources with custom names. - Click
Create stackto proceed with the Stack creation.
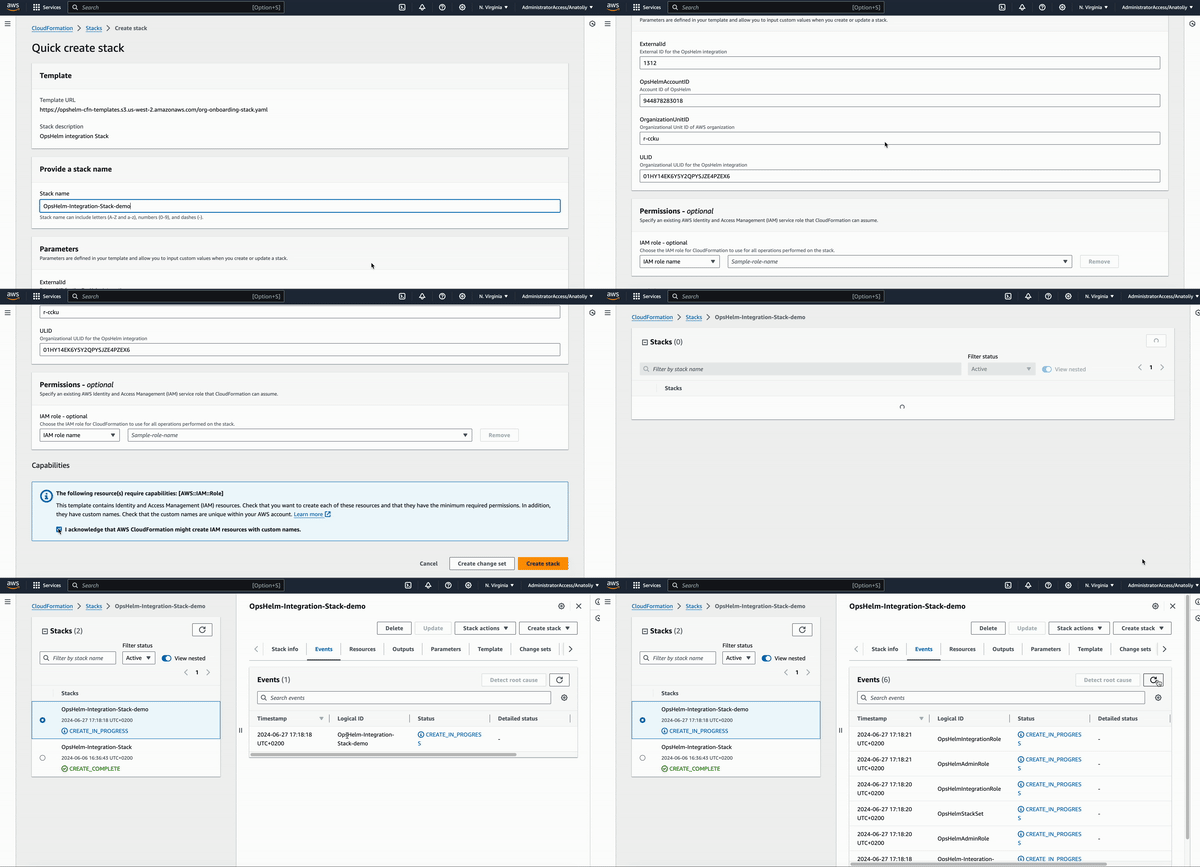
- It can take a while for the Stack to be created depending on the number of accounts in the organization.
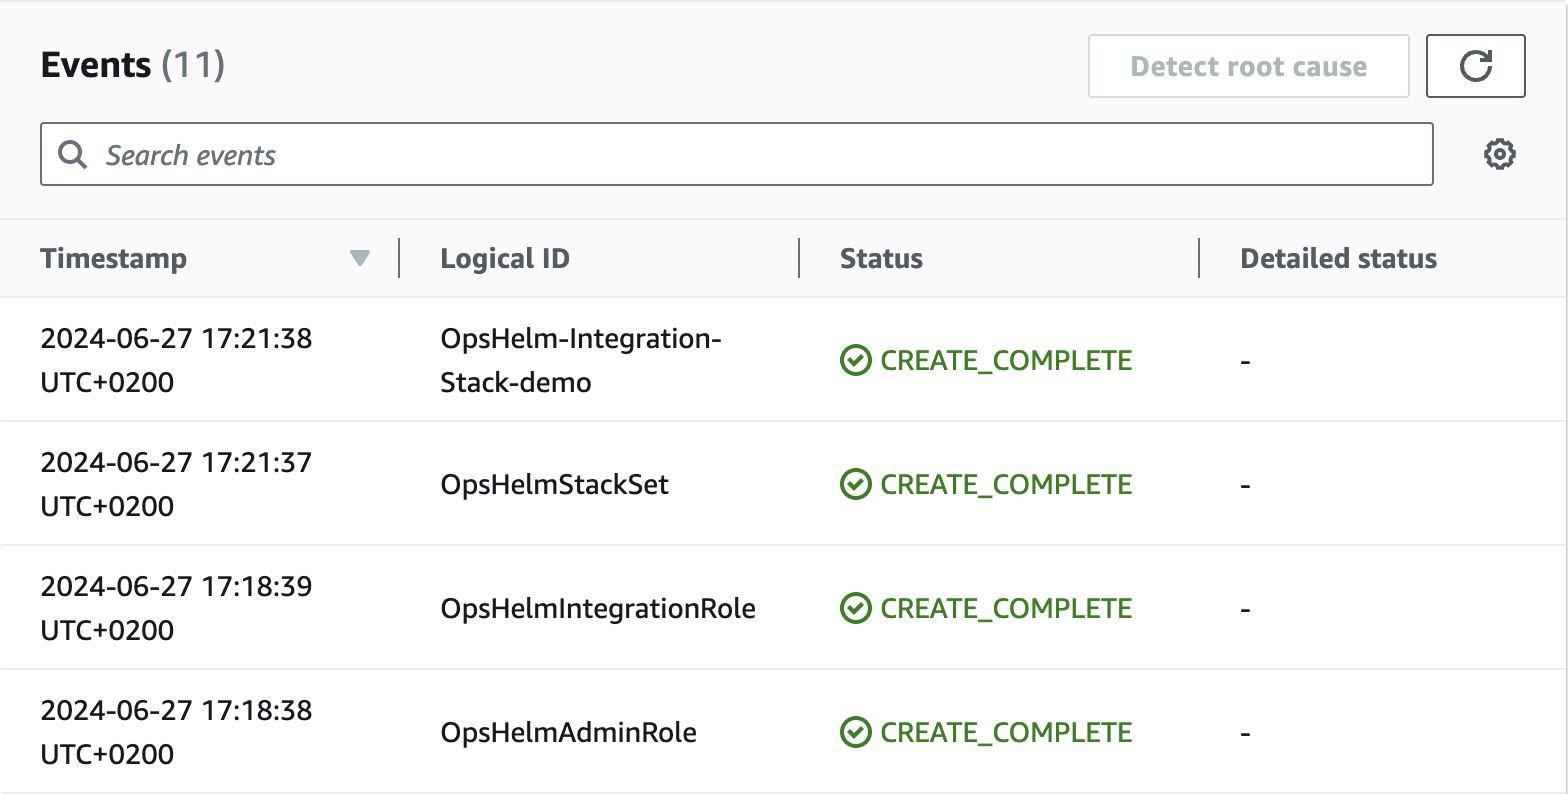
Once it is done, you will see the Stack status
CREATE_COMPLETEin the AWS CloudFormation console.
Wrapping Up
After authorizing OpsHelm and clicking Continue, the onboarding process will connect your account to OpsHelm. The onboarding screen will display the status of the onboarding process while it's in progress.
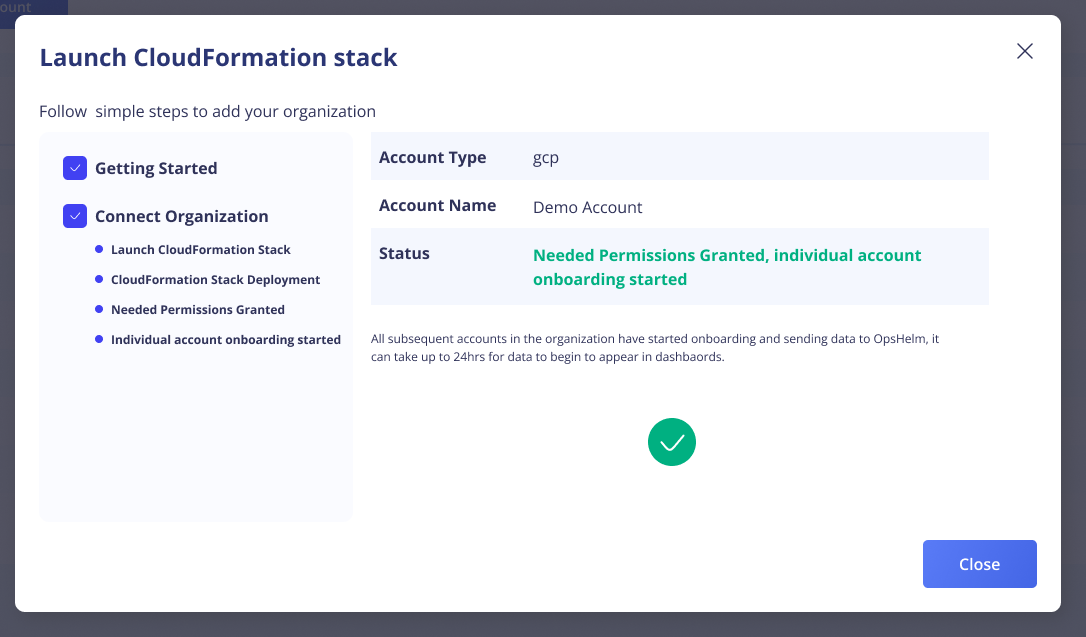
Note: All subsequent accounts in the organization have started onboarding and sending data to OpsHelm, it can take up to 24hrs for data to begin to appear in dashbaords.